Google Chrome, the most popular web browser for PC users, initially delivers a fast and responsive browsing experience. However, over time, Chrome can become sluggish due to factors like cache files, extensions, and resource consumption.
Looking to speed up Chrome? Let’s make your Google Chrome Faster and more secure. And we’ll give you a noticeably better browsing experience.
1. Always update Chrome
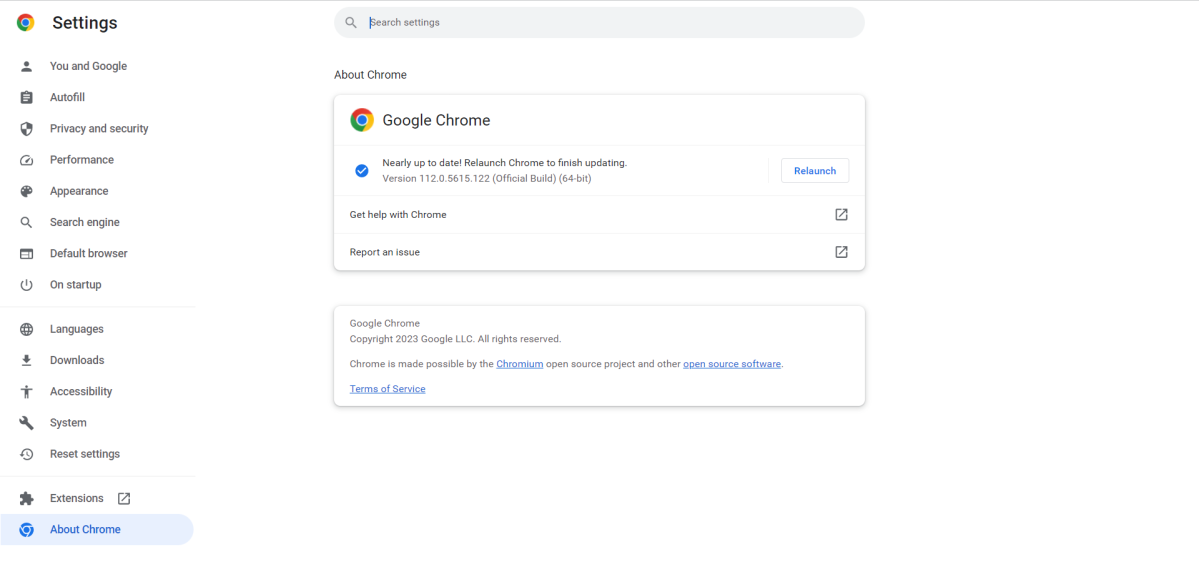
Updating Google Chrome to the latest version ensures that you have the most recent performance improvements, bug fixes, and security updates. Google frequently provides updates to its browser, so it’s important to always stay up-to-date.
Chrome is designed to update automatically in the background when you close your browser. If you’re like the many out there who almost never close their browsers, you should check for an update.
Chrome will place a button in the top-right corner of the browser window when it’s time for an update. Just click it to update Chrome. If you don’t see it, in the top-right corner of the window, click the three vertical dots > Help > About Google Chrome. Here, Chrome will check and install updates. Click Relaunch to finish updating Chrome. Chrome will close, so make sure you don’t have any unfinished work open in a tab.
2. Be conservative with your Tabs
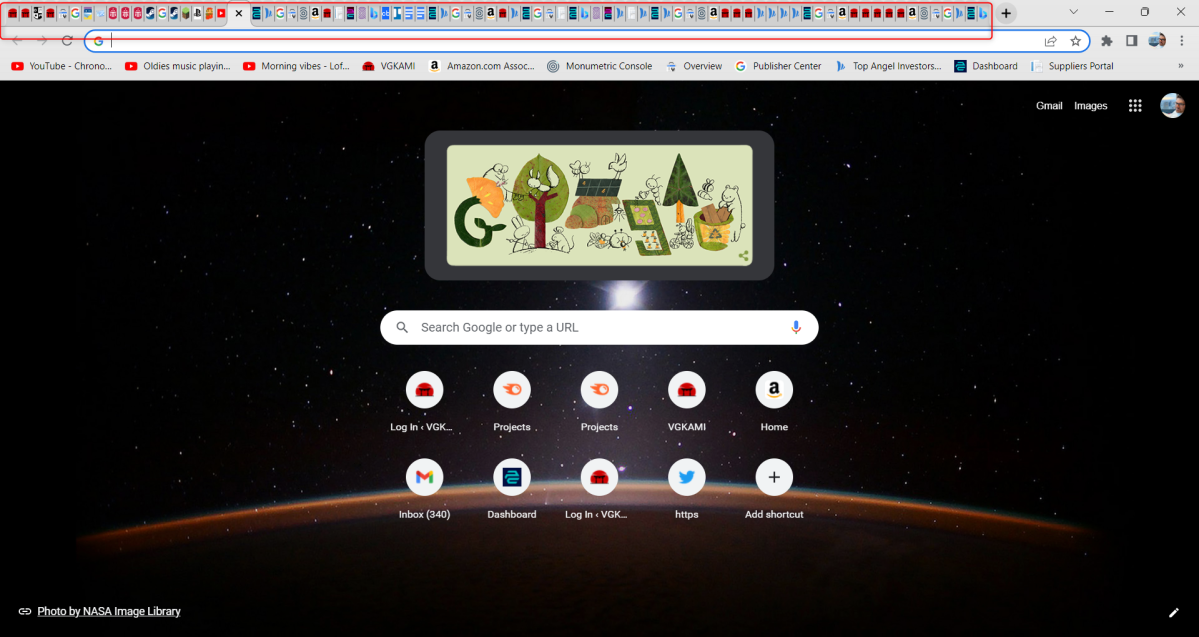
Having multiple tabs open in your browser consumes memory (RAM) and, to a lesser extent, processing power (CPU). As the number of open tabs increases, so does the demand on your computer’s resources. This can lead to slower performance, increased page load times, and even crashes or freezes if your system becomes overwhelmed.
3. Disable unused extensions
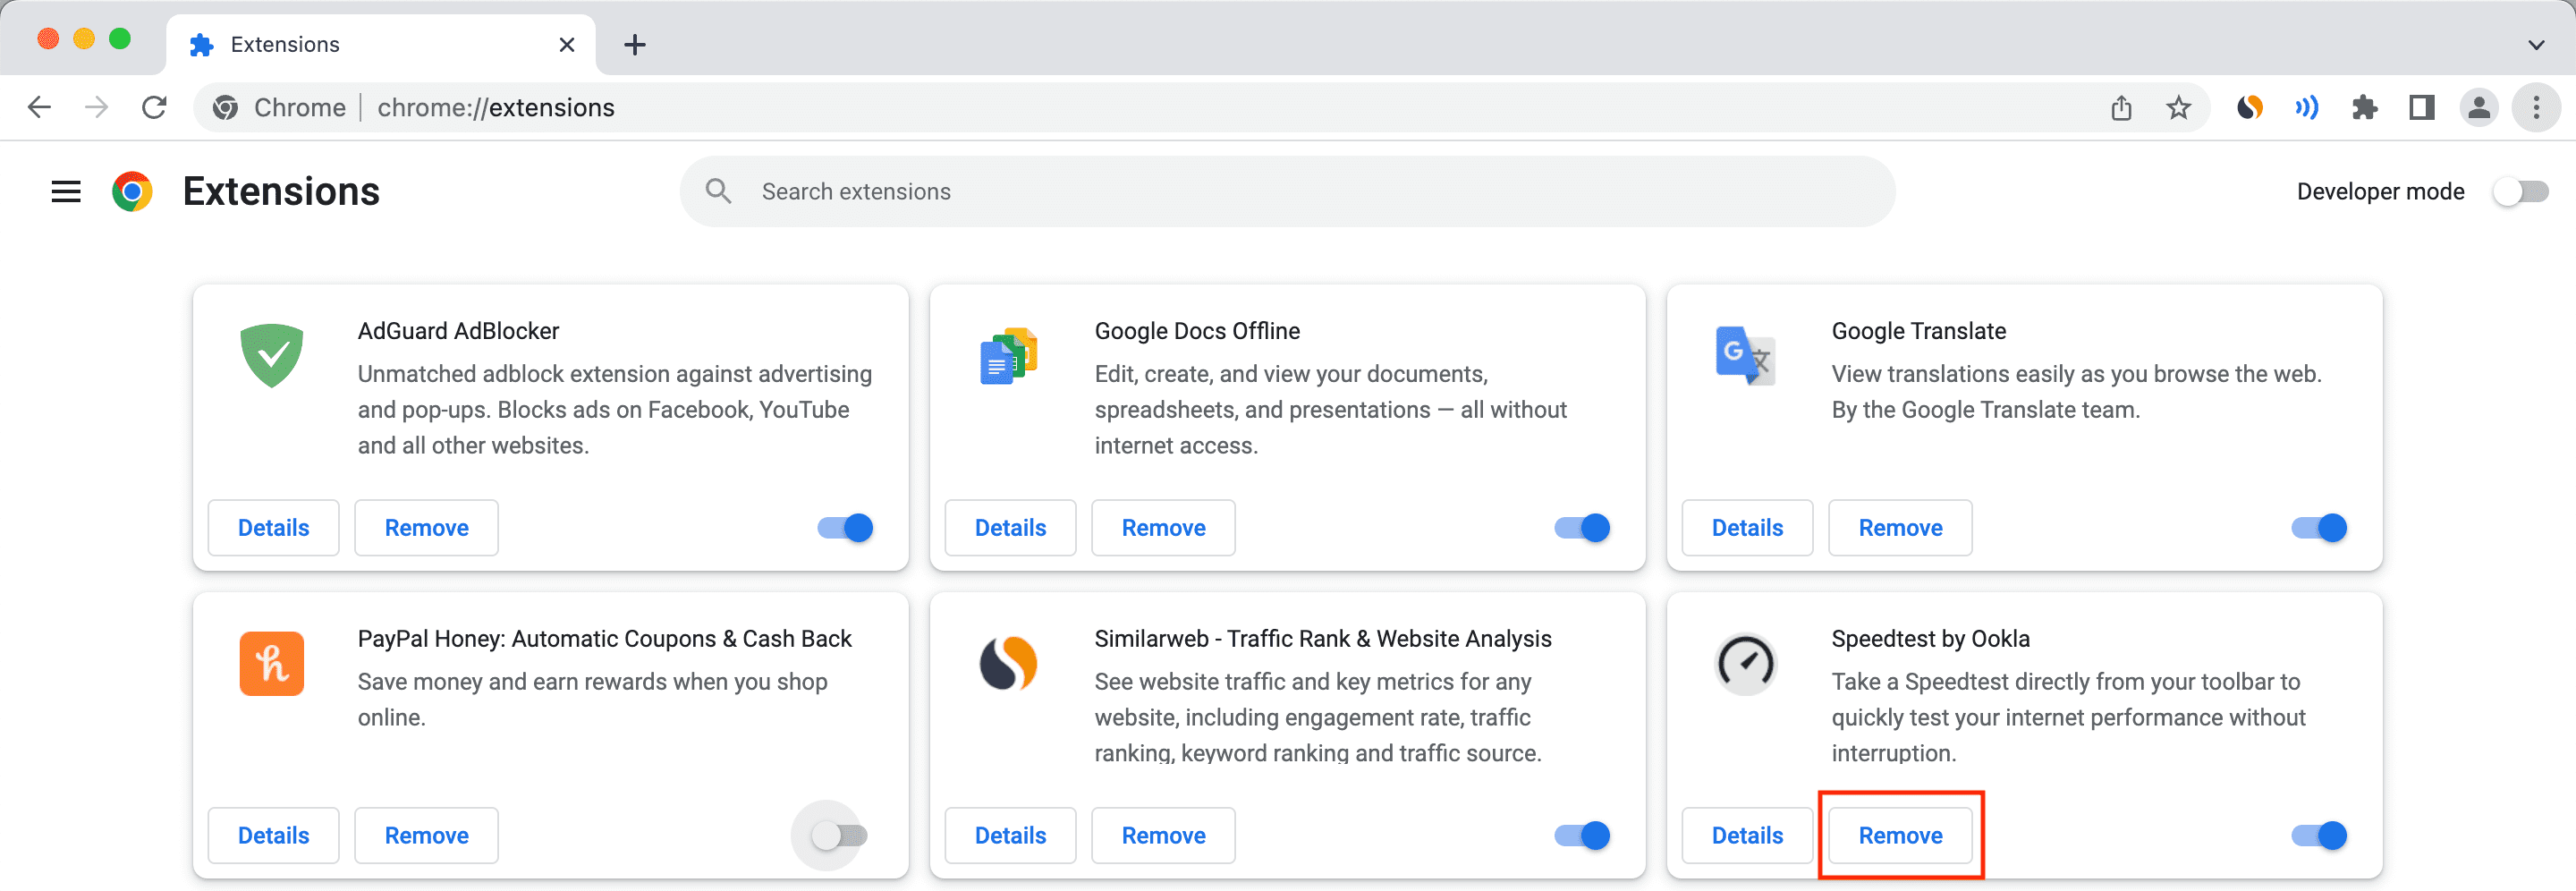
Extensions are small software programs that add functionality to your browser. They can be useful, having too many extensions installed or using poorly optimized ones can negatively impact Google Chrome’s performance. Disabling unnecessary extensions can help speed up your browser’s performance.
You can disable browser extensions by going to chrome://extensions and then toggling the extension’s slider to the Off position, or by clicking Remove.
4. Clear your browsing data
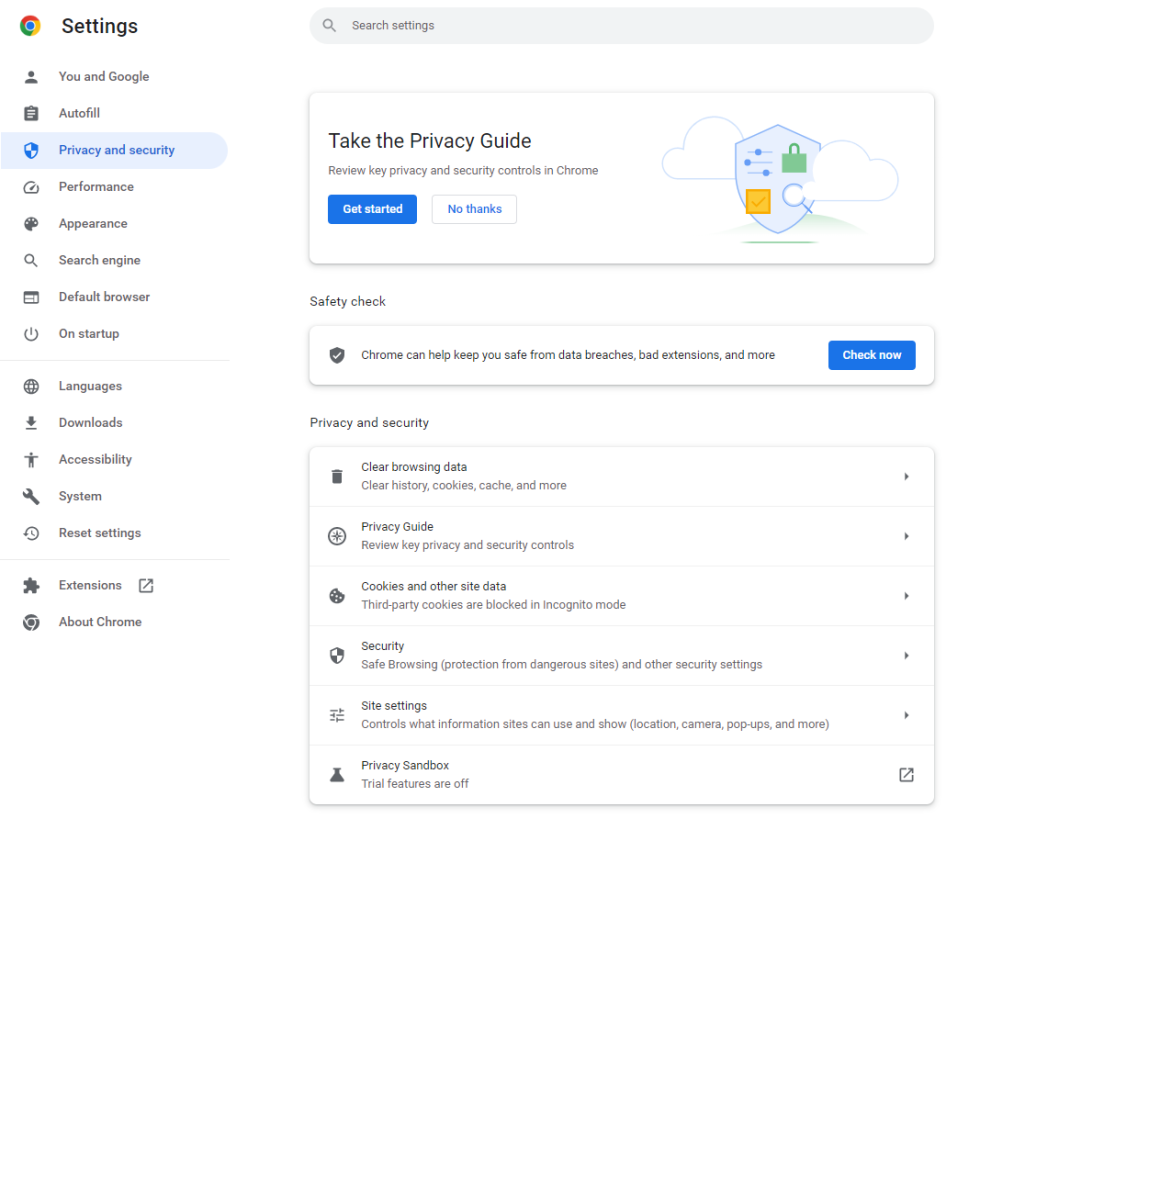
Clearing browsing data, including history, cookies, and cached files, can enhance performance by freeing up disk space and resolving website issues caused by outdated or corrupted files. This not only improves system performance but also enhances privacy and security.
Clearing browsing data can also lead to better performance by reducing RAM usage since cookies and cached files are usually stored in your computer’s RAM for quick access. This usually means smoother browsing and faster page loading times, especially if your device has limited memory.
You can clear your browsing data by clicking the three vertical dots > Settings > Privacy and Security. Here, you’ll select each option individually and delete the data.
5. Preload web pages
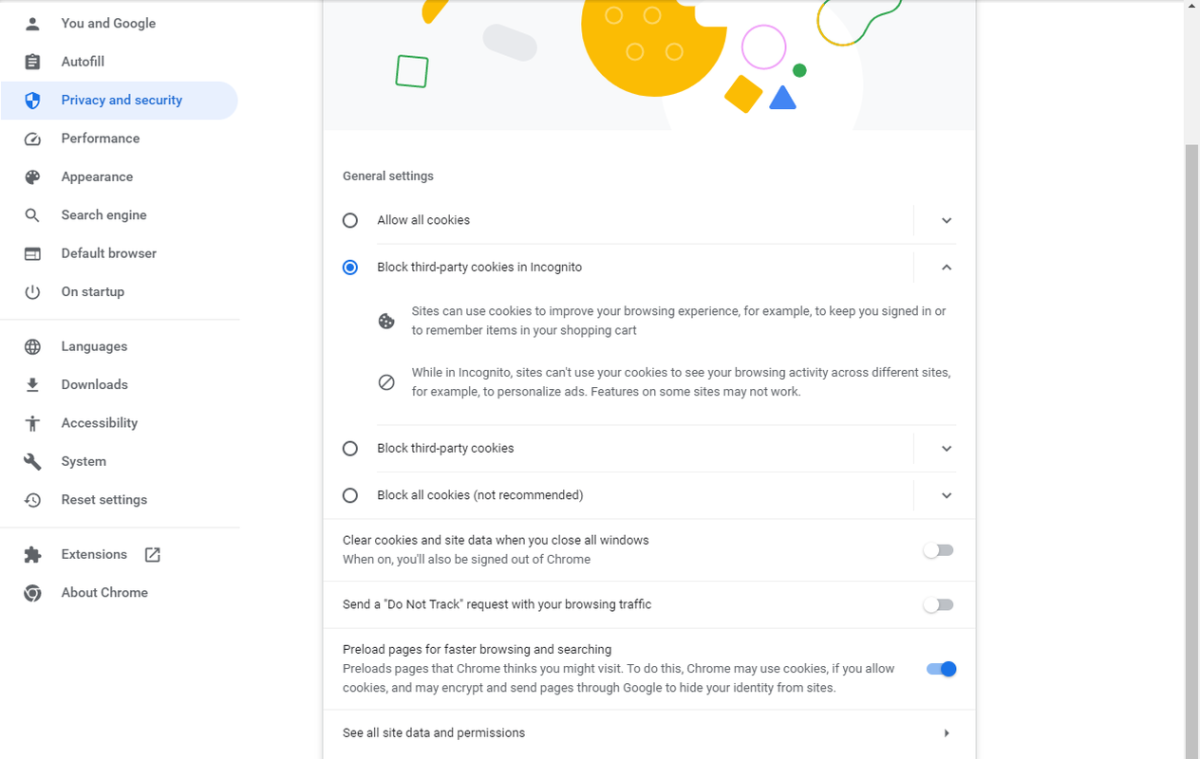
Preloading web pages improves performance by fetching and loading resources for a web page before you actually navigate to it. When you hover over a link or when the browser predicts that you’re likely to visit a particular page, Chrome can start fetching the resources (such as images, CSS, and JavaScript files) needed to display the page. This is done in the background while you’re still on the current page. When you eventually click the link, Chrome has already loaded much of the content, so the page appears to load faster.
You can enable the feature to preload web pages by clicking the three vertical dots > Settings > Privacy and Security > Cookies and other site data. Toggle the slider next to Preload pages for faster browsing and searching to the On position.
6. Use Chrome’s Energy Saver
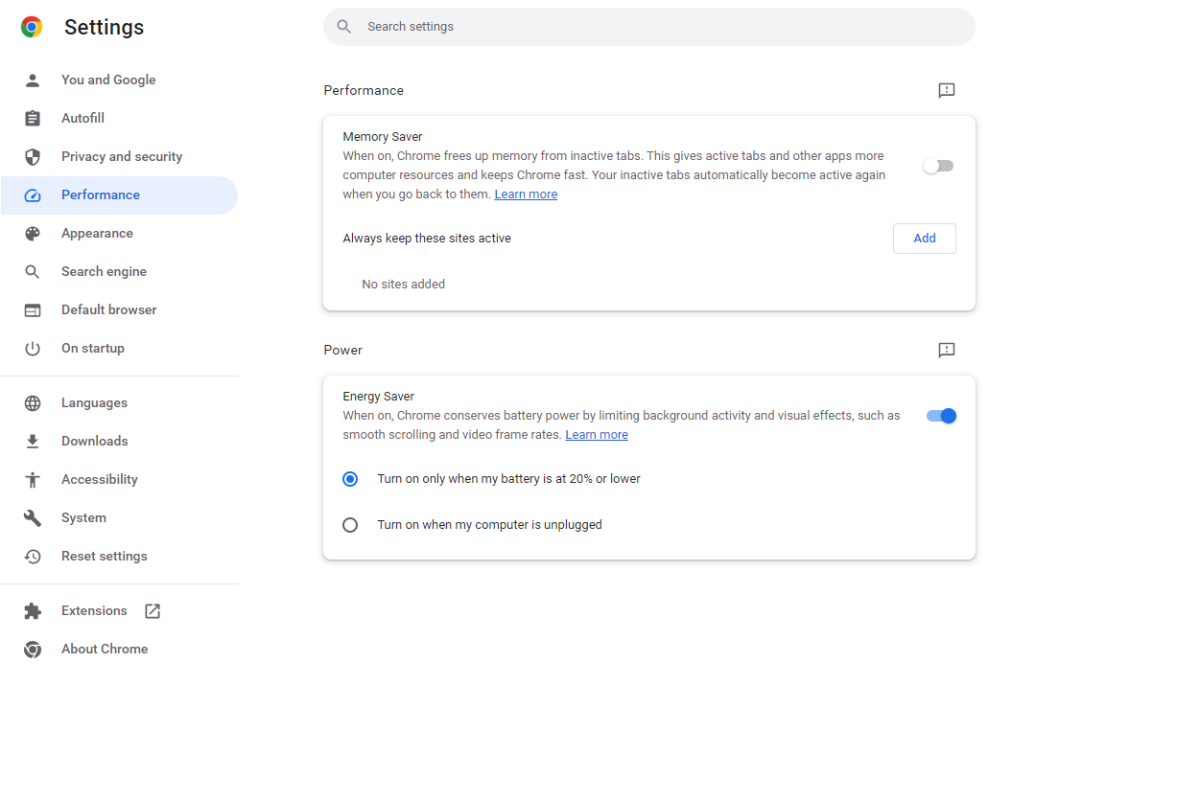
Chrome’s Energy Saver’s main function is to conserve battery life, but it’s also improves performance a bit by limiting certain background activity. You can set Energy Saver to only turn on when your battery hits 20 percent capacity, but you can also enable it when your computer is unplugged.
To enable Energy Saver, click the three vertical dots > Settings > Performance. In the Power group, toggle the slider next to Energy Saver to the On position. Next, choose when you’d like this feature to activate.
7. Turn on Hardware Acceleration
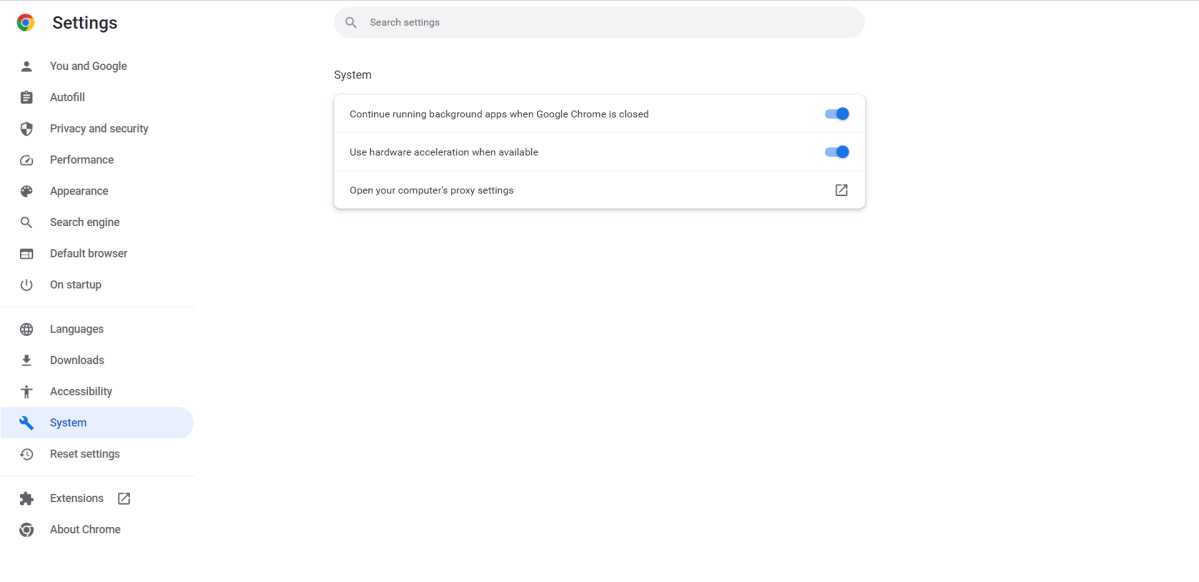
Hardware acceleration tells Chrome to use your computer’s GPU for specific tasks that can benefit from it. GPUs are designed to handle graphics-intensive tasks efficiently and can parallelize certain operations, making them more suited for tasks like rendering graphics, animations, and video playback.
By offloading some of these tasks from the CPU to the GPU, you’ll see improved performance, smoother rendering of web content, and reduced system resource consumption. This can be especially beneficial on systems with powerful graphics or when using applications and websites with heavy graphical elements.
To enable hardware acceleration, click the three vertical dots > Settings > System. Here, toggle the slider next to User hardware acceleration when available to the On position.
8. Enable GPU rasterization in Google Flags (Experimental)
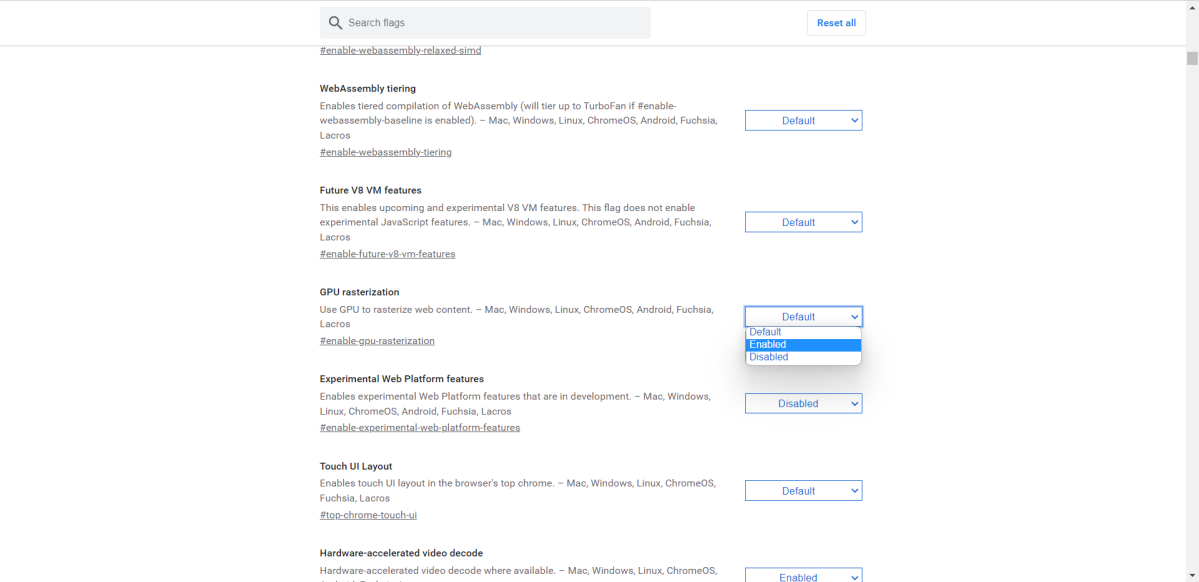
Rasterization is the process of converting vector graphics (like HTML, CSS, and SVG elements) into pixels that can be displayed on your screen. By default, Chrome uses the CPU for rasterization.
Enabling GPU Rasterization offloads this task to your computer’s GPU instead. GPUs are designed to handle graphics processing more efficiently than CPUs, which can lead to faster rendering of web pages and improved performance, especially on systems with a powerful GPU.
You can enable GPU rasterization by going to chrome://flags, searching GPU Rasterization, and then selecting Enabled next to it.
It’s worth noting that these are experimental features, and Google Chrome is pretty clear about only using these for testing purposes. Just because you can use it, doesn’t mean you should. The risk may be higher than the reward. And if you’ve enabled Hardware Acceleration, then you already have rasterization enabled anyway.
9. Reset Google Chrome
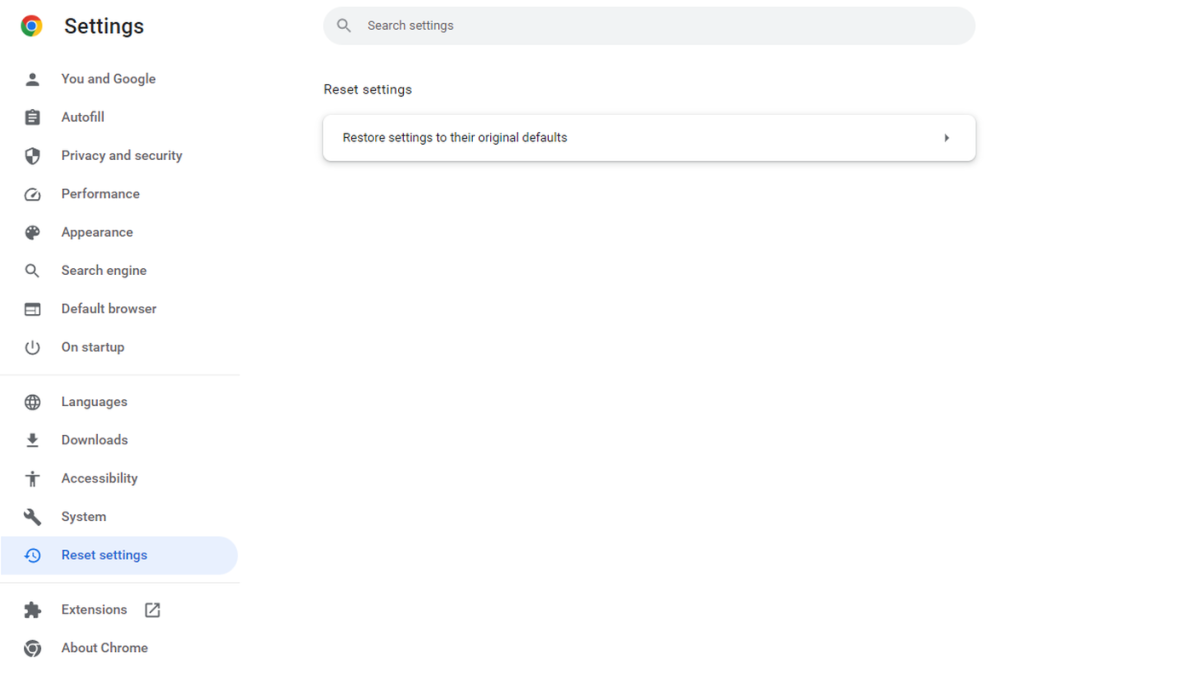
Resetting Chrome to its default settings can resolve performance issues by restoring the browser to its original configuration, eliminating any customizations, extensions, and settings that may be causing slowdowns or other problems.
You may want to do this if you’ve tried other performance improvement methods without success or if you’re unsure about which specific settings or extensions are causing the issues.
To reset Google Chrome, click the three vertical dots > Settings > Reset Settings. You’ll find the option to reset Chrome to its default settings on this page.
Google already makes Chrome Faster
Google Chrome 112 brought significant performance improvements to the popular web browser. Optimizations have been made to JavaScript functions such as to String() and join(), as well as specialized fast paths for parsing innerHTML.
These features are extensively utilized across numerous websites and web apps, resulting in a noticeable difference in web browsing. Google reported a 10% increase in Apple’s Speedometer 2.1 browser benchmark over three months due to these improvements.
This is yet another reason to always keep Chrome up-to-date. Google is constantly bringing performance updates to Chrome, so let them do the hard work for you.